Why Gutter Seams Leaking Is a Problem You Should Not Ignore
Gutter seams leaking is one of the most common exterior drainage problems homeowners face, and it can quietly cause serious damage long before you notice anything wrong.
Here is a quick answer if you just need the basics:
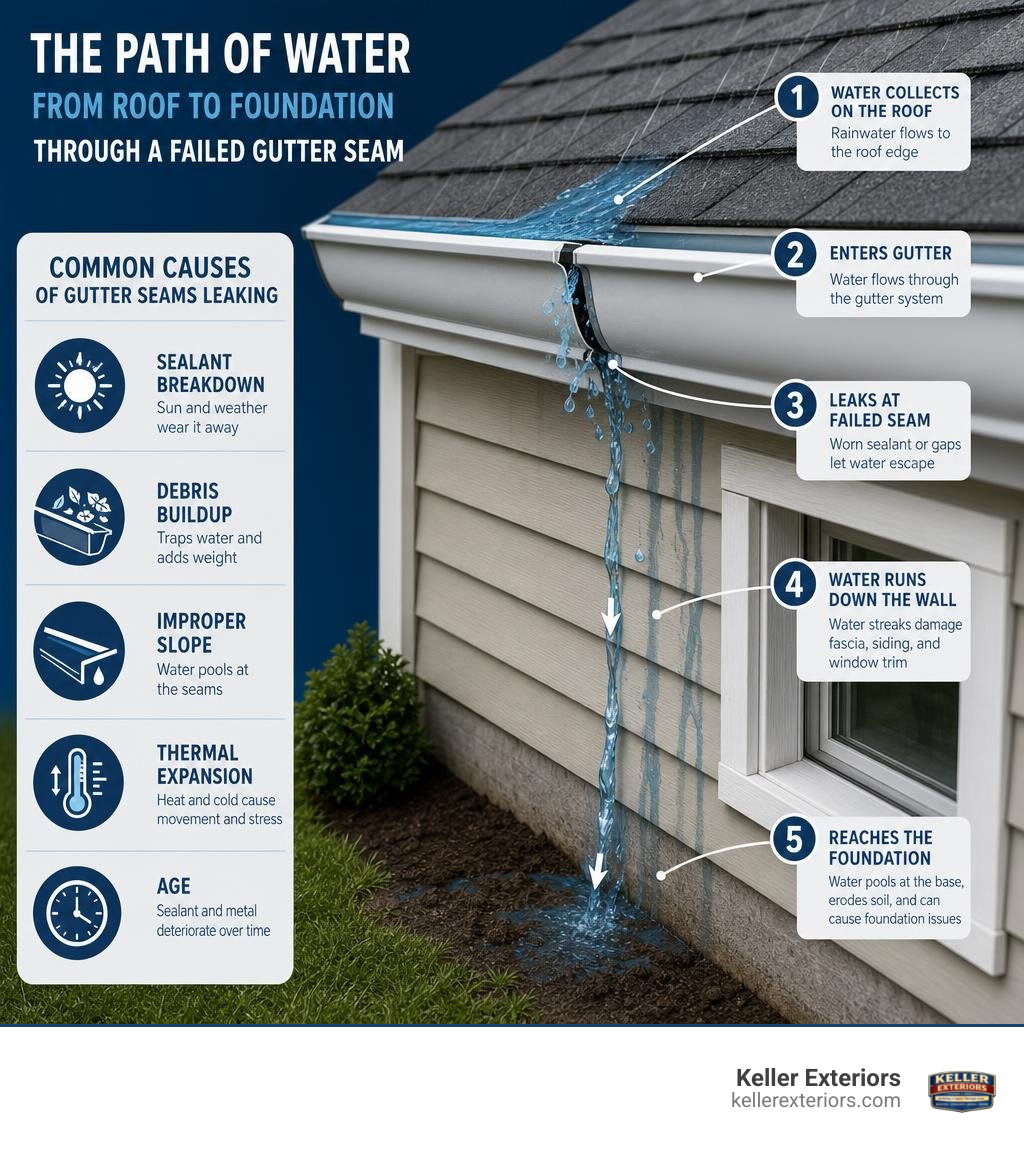
- What causes it: Sealant failure, debris buildup, improper slope, thermal expansion, and age
- How to fix it: Remove old sealant, clean and dry the joint, apply butyl rubber or silicone gutter sealant from the inside, and allow 24 to 48 hours to cure
- When to replace: If gutters are over 20 years old, show widespread rust, or are sagging in multiple spots
- How to prevent it: Clean gutters twice a year, check seams after storms, and secure loose hangers
Sectional gutters have a joint roughly every 10 to 12 feet along your roofline. Every one of those joints is a potential leak point. Over time, the sealant holding those joints together breaks down from sun, rain, freezing temperatures, and the constant weight of water and debris. According to industry data, most gutter sealants only last 10 to 20 years, while the gutters themselves can last 20 to 30 years. That gap means sealant failure is almost inevitable.
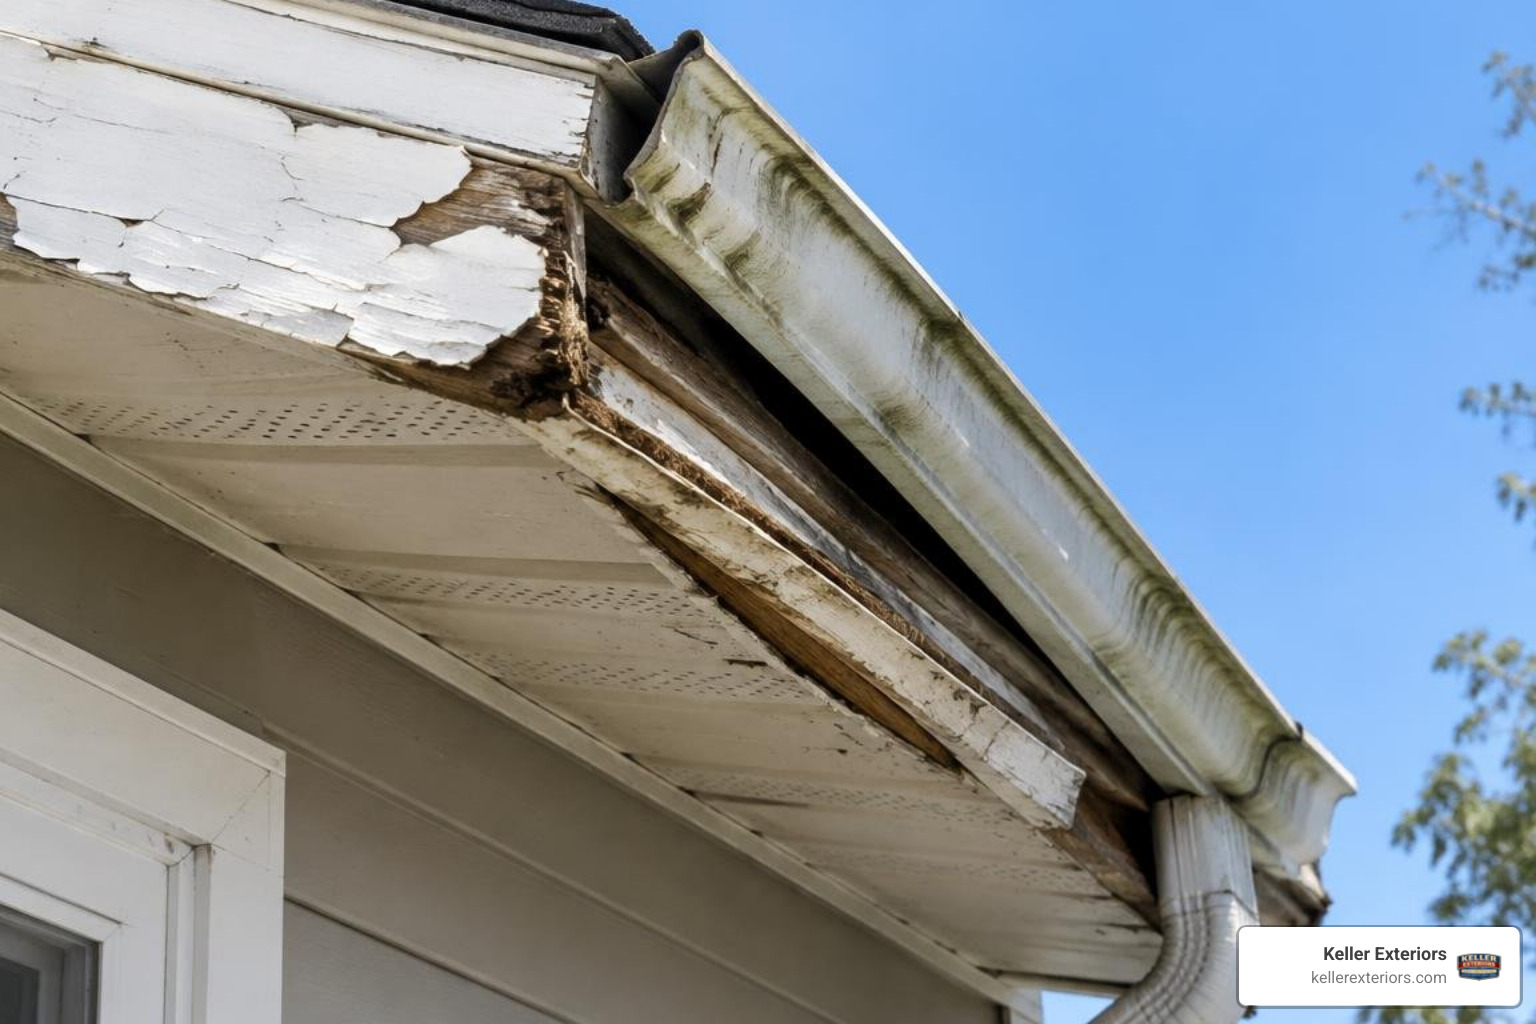
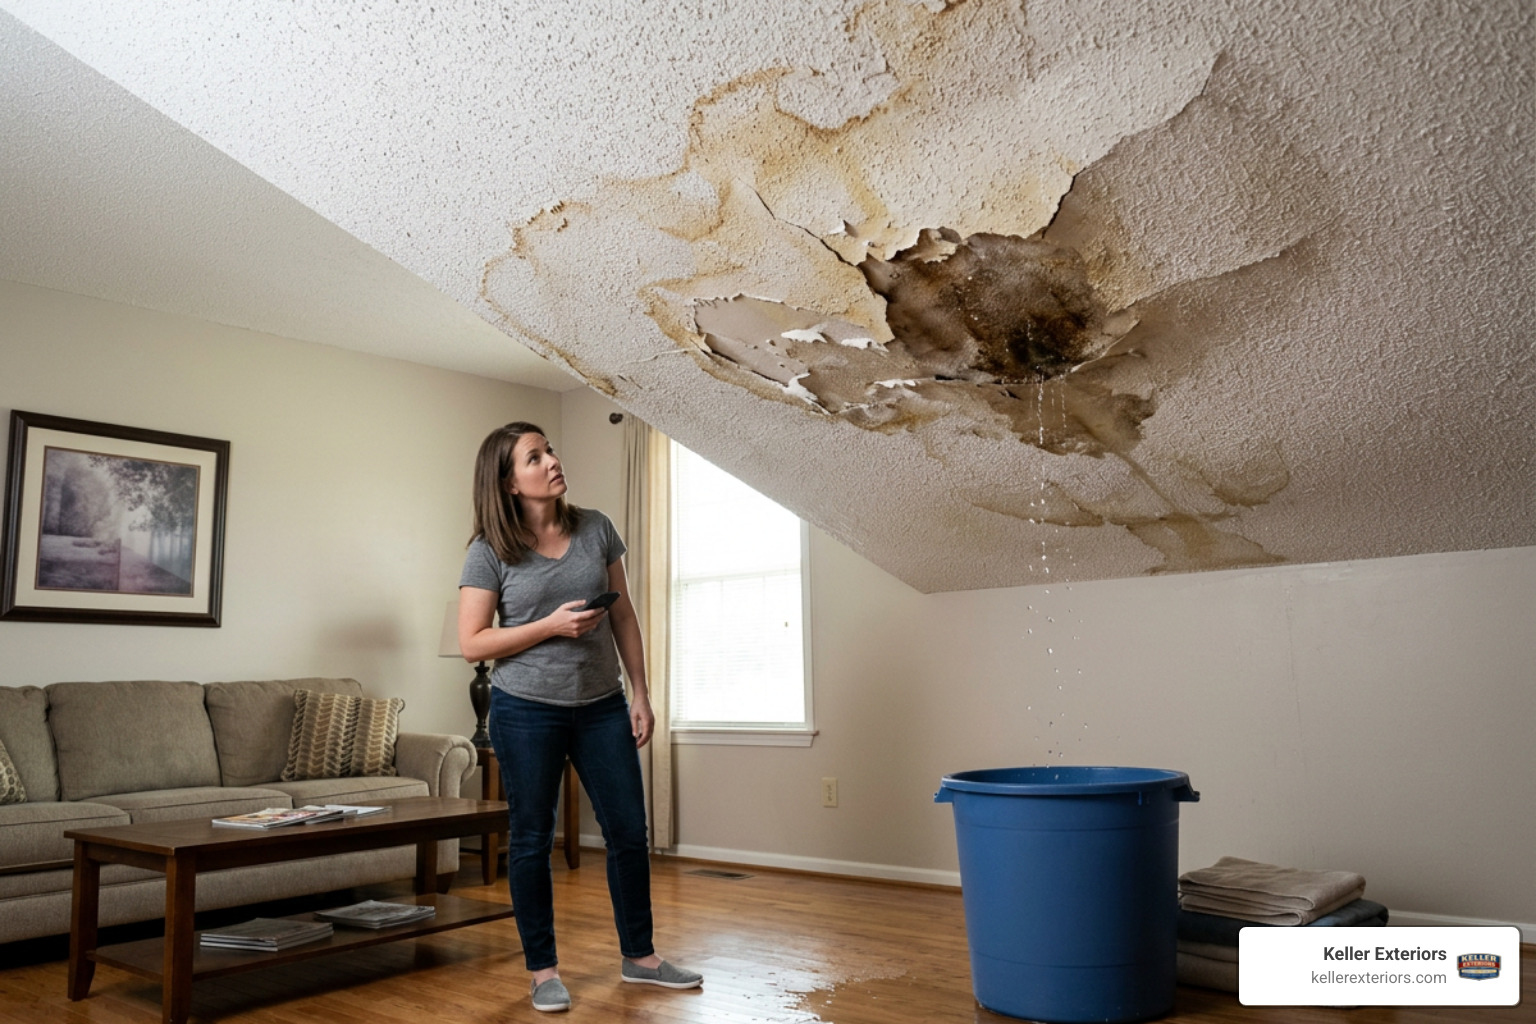
The tricky part is that a small drip at a seam rarely stays small. Water escaping at a joint can damage fascia boards, rot wood trim, stain siding, erode the soil around your foundation, and in serious cases contribute to foundation cracks. Gutter leaks account for up to 37% of all residential water damage claims tied to roof and exterior drainage issues.
Corner seams, also called miter joints, are especially vulnerable. They handle higher water volume, collect more debris, and take the force of roof valley runoff directly. If you have noticed a drip at a corner during a rainstorm, that is one of the most common spots for this kind of failure.
I’m Robert Keller, owner of Keller Exteriors, and over my 25 years in the home improvement industry I have seen how much damage gutter seams leaking can do when left unaddressed. This guide walks you through exactly how to find, fix, and prevent the problem.
What Causes Gutter Seams Leaking in Residential Homes?
To fix a leaking gutter, you must first understand why the joint failed. Sectional gutter systems rely on a series of connections to route water safely away from your home. When these connections fail, water finds the path of least resistance.
Sealant Degradation and Thermal Expansion
The primary culprit behind joint failure is the natural wear and tear on the sealant. Standard gutter sealants face harsh weather year-round. In Oklahoma, our hot summers and freezing winters cause metal gutters to expand and contract constantly. This thermal movement puts immense physical stress on the joints. Over time, even high-quality sealants lose their flexibility, dry out, crack, and separate from the metal surfaces.
Debris Buildup and Standing Water
When leaves, twigs, and pine needles accumulate in your gutters, they create natural dams. This debris holds water in place, creating pools of standing water directly over your seams. Gutter joints are designed to handle flowing water, not continuous submersion. Standing water places constant hydraulic pressure on the sealant, accelerating its breakdown.
Improper Gutter Slope and Clogged Downspouts
Gutters must slope toward the downspouts at a precise angle, typically a quarter-inch drop for every 10 feet of length. If your gutters lack the proper pitch or have started to sag, water will pool instead of draining. Clogged downspouts compound this problem by backing up the entire system, filling the gutters to the brim, and forcing water through the seams.
Corner Miters and Roof Valley Runoff
Corner seams, or miter joints, are especially prone to leaking. Roof valleys channel massive amounts of water from multiple roof planes directly into these corners. This concentrated, high-velocity runoff creates turbulence that wears down sealant faster than straight sections.
Structural Shifting and Loose Hangers
As homes settle, the fascia boards and roofline can shift slightly. This shifting, combined with loose or missing gutter hangers, causes the gutter sections to twist or pull apart. Once the mechanical connection between two sections is compromised, the sealant inside the joint will tear, leading to immediate leaks.
How to Identify and Diagnose a Leaking Gutter Seam
Finding a leak during a heavy downpour is easy, but you can also spot the warning signs on a dry day if you know what to look for. Regular inspections help you catch problems before they require expensive structural repairs.
Visual Clues on the Gutter Exterior
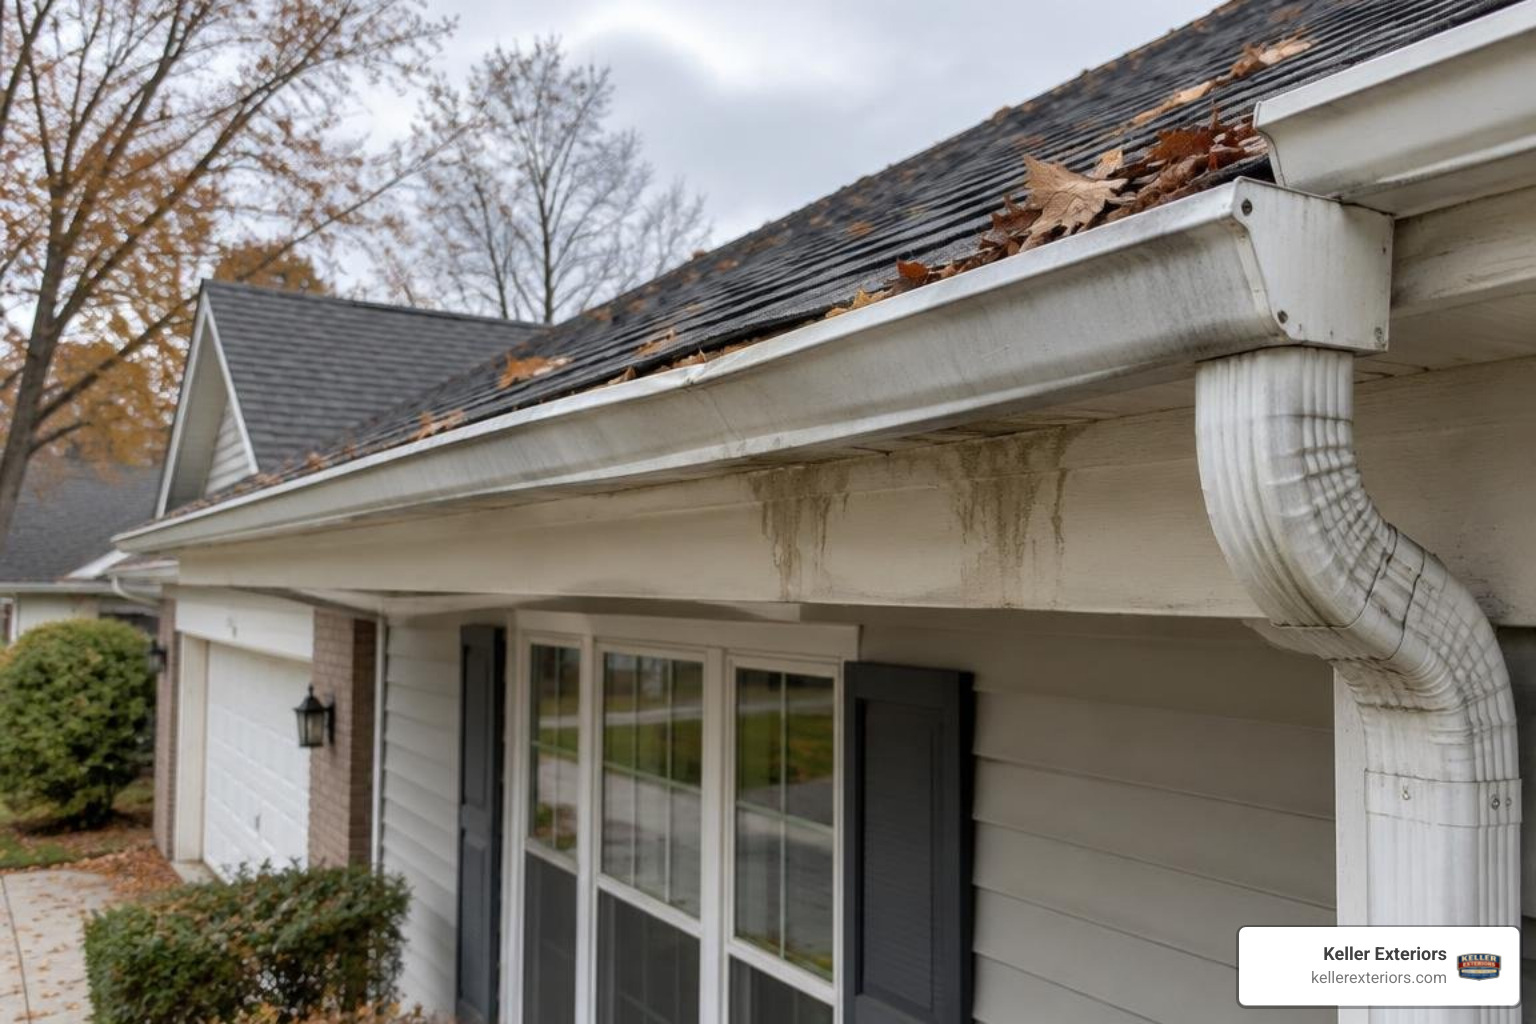
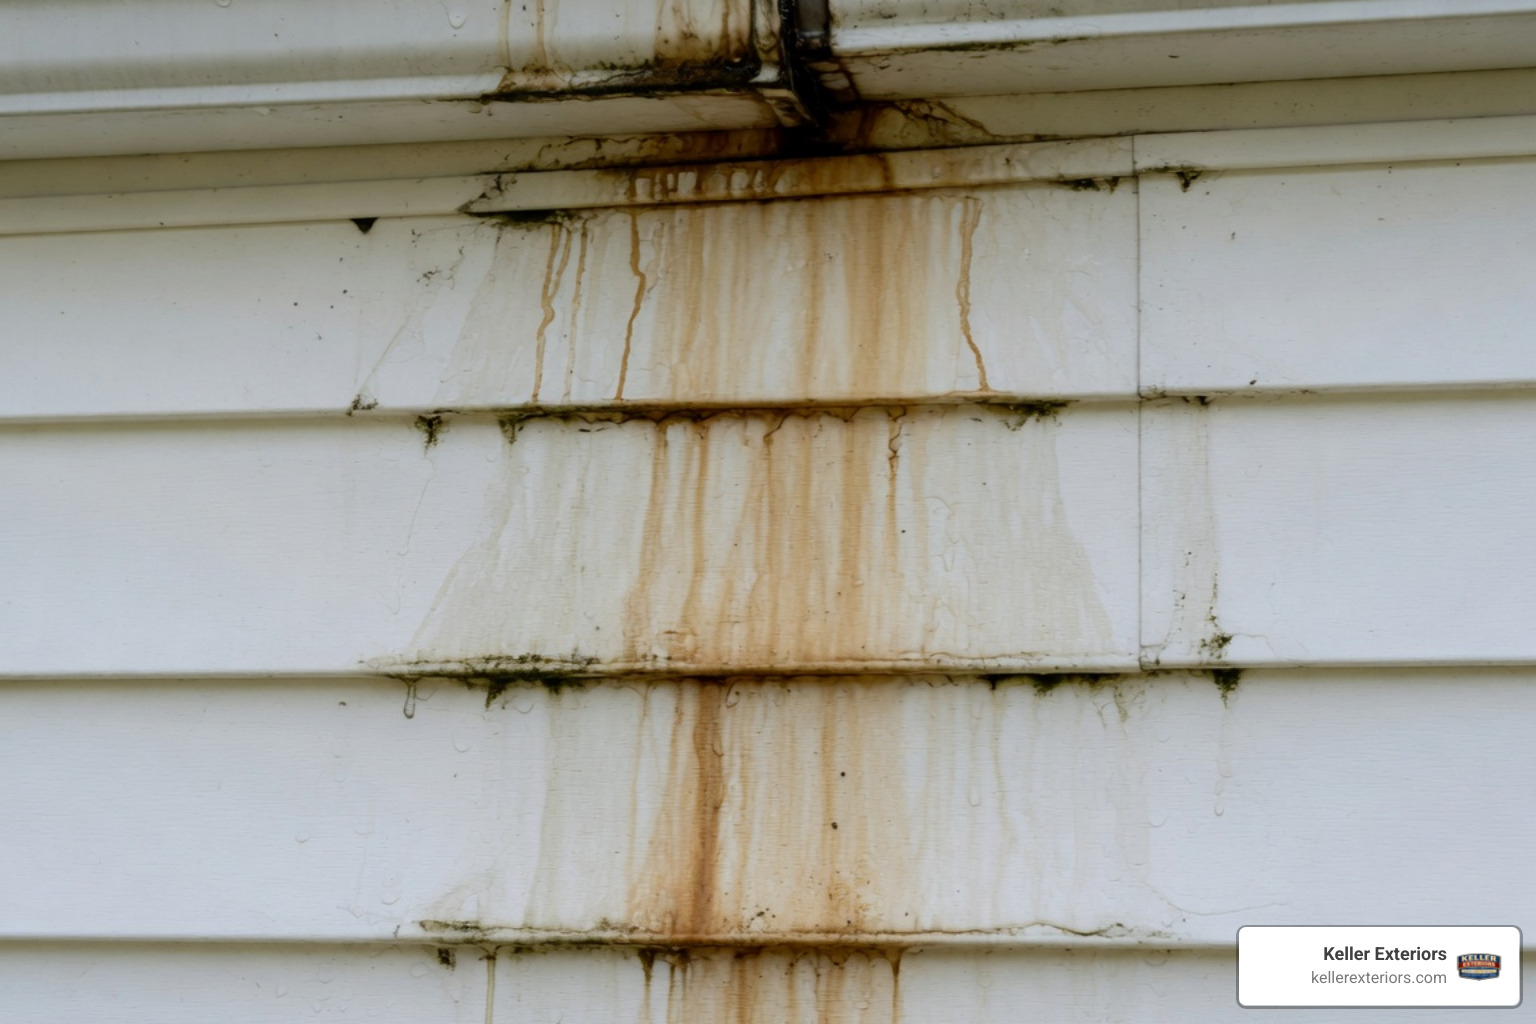
Walk around the perimeter of your home and look up at the underside of your gutters. If you see dark water marks, grey or white mineral deposits, or rust colored stains directly beneath a joint, you have a leaking seam. Peeling paint on the underside of the gutter or on the nearby trim is another clear indicator that moisture is escaping.
Damage to the Fascia and Siding
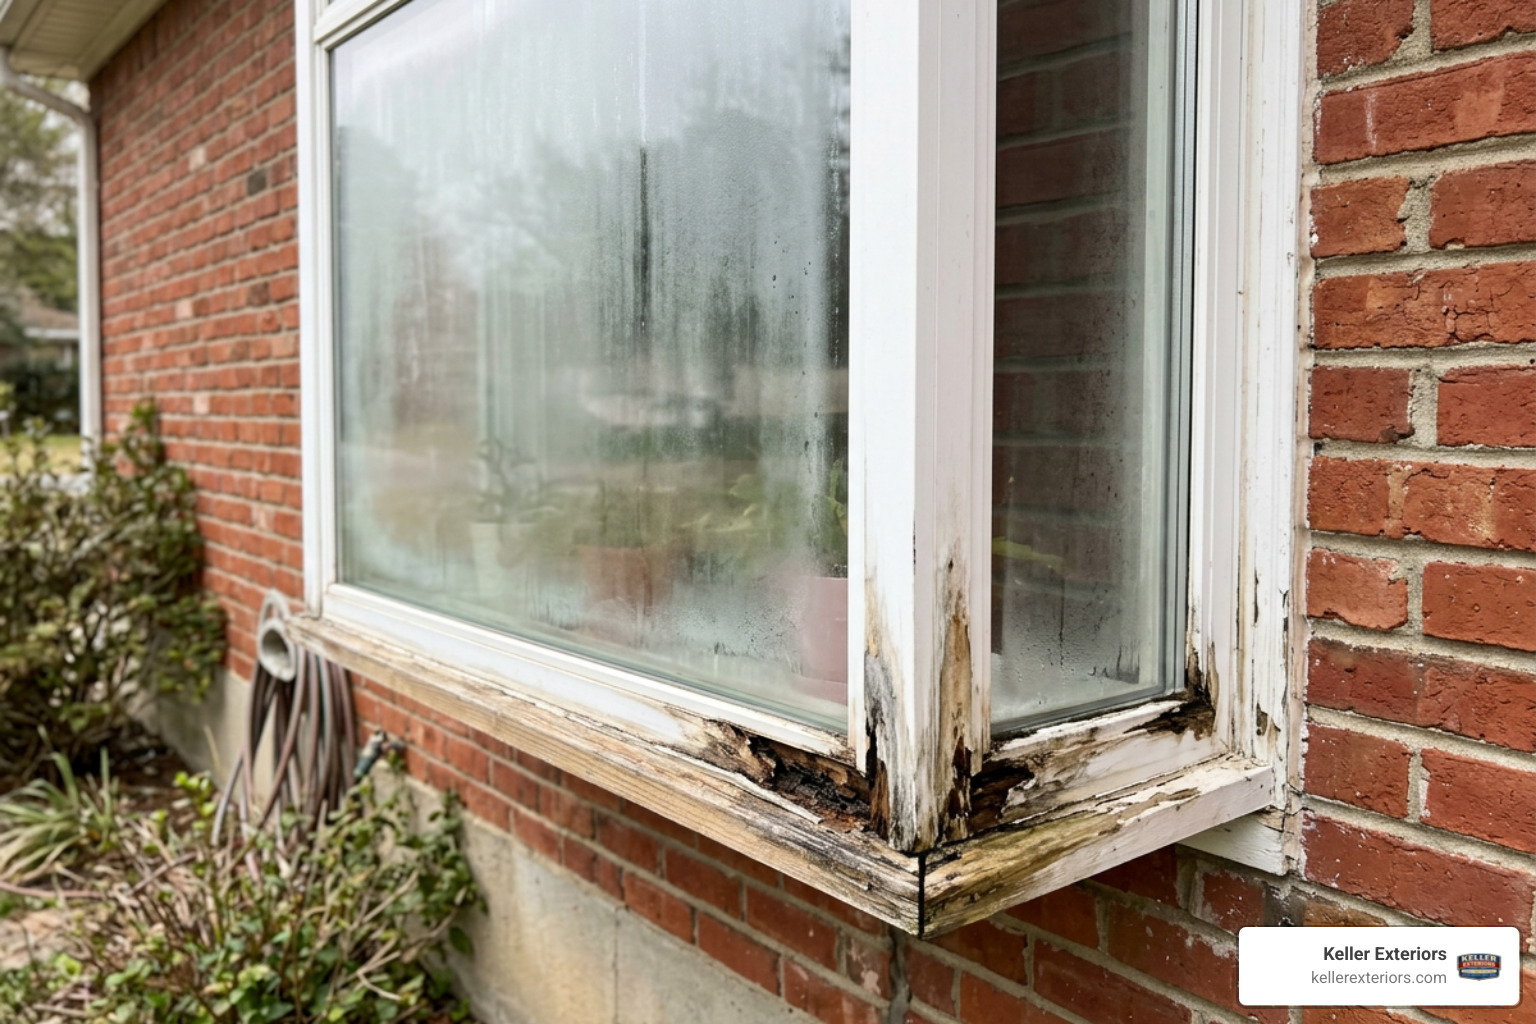
Water dripping from a seam does not just fall straight down. Wind often blows the dripping water back against your home. Look for water stains, mold growth, or rotting wood on your fascia boards. If you have wood siding, check for soft spots, warping, or peeling paint near the gutter joints. For homes with vinyl siding, look for dark streaks or green algae growth. If you notice structural issues with your siding while checking your gutters, our team offers professional siding repair and installation services to restore your home’s exterior.
Soil Erosion and Foundation Pooling
Take a look at the ground directly beneath your gutter seams. If you see small trenches carved into your landscaping, washed-out mulch, or exposed plant roots, you have water dripping from above. During heavy rains, this water can pool next to your foundation, leading to basement moisture or concrete cracks.
The Garden Hose Test
If you suspect a leak but cannot find the exact spot, conduct a simple test on a dry day. Block the downspout with a rag and run a garden hose into the gutter section farthest from the downspout. Let the gutter fill with a few inches of water. Walk along the perimeter and inspect each joint. You will quickly see water dripping or seeping from any compromised seams.
Step-by-Step Guide: How to Fix a Leaking Gutter Seam
Fixing a leaking gutter seam is a highly manageable weekend project. However, the secret to a repair that lasts for years, rather than just one season, lies in thorough preparation.
Step 1: Gather Your Tools and Safety Gear
Before climbing a ladder, ensure you have all the necessary equipment. You will need:
- A sturdy A-frame or extension ladder
- Safety glasses and heavy-duty work gloves
- A stiff wire brush and a plastic putty knife or scraper
- Isopropyl alcohol or mineral spirits
- Clean rags
- High-quality gutter sealant and a caulking gun
- A garden hose for testing
Step 2: Practice Ladder Safety
Always place your ladder on firm, level ground. If you are working on an extension ladder, use a ladder standoff stabilizer to avoid resting the weight directly on your gutters, which can bend the metal and create new slope issues. Never overreach while on the ladder; instead, climb down and move the ladder as you progress.
Step 3: Clean the Joint Thoroughly
Sealant will not adhere to wet, dirty, or greasy surfaces. Scoop out all leaves, mud, and organic debris from the leak area. Use your wire brush and scraper to remove every trace of the old, failed sealant. Scraping away the old material is critical because new sealant will not bond properly to old silicone or butyl rubber.
Step 4: Degrease and Dry the Surface
Once the old sealant is gone, wipe the interior of the joint with a rag soaked in isopropyl alcohol or mineral spirits. This step removes remaining residue, fine dust, and oils. Allow the metal to dry completely. If the metal is damp, the new sealant will fail to form a watertight bond.
Step 5: Apply the New Sealant
Load your sealant into the caulking gun. Apply a continuous, generous bead of sealant directly over the seam on the inside of the gutter. Do not apply sealant to the outside underside of the gutter, as water will still find its way into the joint and trap moisture, causing rust. Use a gloved finger or a tooling tool to smooth the sealant, pressing it firmly into the seam to eliminate air pockets.
Step 6: Allow Proper Curing Time
Most professional-grade sealants require 24 to 48 hours to cure fully. Do not run water through the gutters or attempt to test the repair during this window. Check the weather forecast before starting your project to ensure you have at least two dry days ahead.
Step 7: Test Your Repair
After the sealant has fully cured, run your garden hose into the gutter to verify that the joint is completely watertight. If you notice any other issues with your roofline or shingles while working near the gutters, you can explore our expert residential roofing and gutter solutions to ensure your entire roof system is protected.
Choosing the Best Sealant for Gutter Seams Leaking
Selecting the right material is the difference between a temporary patch and a long-term repair. Standard household acrylic caulk is not suitable for gutters because it lacks the necessary water resistance and flexibility.
| Sealant Type | Average Lifespan | Pros | Cons |
|---|---|---|---|
| Butyl Rubber | 5 to 10 Years | Excellent adhesion to metal, highly flexible, handles constant moisture well | Can be messy to apply, longer full cure time |
| Silicone | 10 to 15 Years | Exceptional UV resistance, remains flexible in extreme cold, quick drying | Will not adhere to old silicone, cannot be painted |
| Polyurethane | 10 to 20 Years | Extremely durable, strong adhesive properties, paintable | Difficult to apply in cold weather, requires meticulous surface prep |
For most DIY repairs on aluminum and steel gutters, butyl rubber or professional grade polyurethane sealants offer the best balance of flexibility and long-term durability.
Common Mistakes to Avoid When Addressing Gutter Seams Leaking
Many well-intentioned DIY repair projects fail within a few months because of a few common missteps. Avoid these mistakes to ensure your gutters stay dry:
- Sealing from the Outside: Applying sealant to the bottom of the gutter joint is a temporary band-aid. Water will still enter the seam from the inside, trapping moisture against the metal and eventually pushing the exterior patch off. Always seal from the interior.
- Applying New Sealant Over Old: This is the most common cause of premature repair failure. New sealant cannot bond to dirty, weathered, or peeling old sealant. You must scrape the joint down to bare metal.
- Ignoring the Gutter Slope: If your gutter is sagging or sloped away from the downspout, resealing the joint will not solve your problem. The standing water will eventually break down the new sealant. Always check and adjust the slope before sealing.
- Neglecting Mechanical Fasteners: Sealant is designed to keep water out, not to hold the gutters together structurally. If the screws or rivets holding your gutter sections together are loose or missing, replace them before applying sealant.
- Rushing the Curing Process: Exposing new sealant to rain or running water before it has fully cured will ruin the chemical bond, forcing you to clean the joint and start over.
Repair vs. Replacement: When to Install New Gutters
While sealing a leaking joint is an easy fix, there comes a time when repairs are no longer cost-effective. Knowing when to transition from patch jobs to a new installation will save you money and protect your home from water damage.
Consider a Repair If:
- The leak is isolated to one or two joints.
- Your gutters are under 15 years old and structurally sound.
- The gutters have no rust, corrosion, or widespread sagging.
- The leaking seam is easily accessible and can be cleaned down to bare metal.
Consider a Replacement If:
- Your gutters are over 20 years old and approaching the end of their natural lifespan.
- You have multiple leaking seams along the straight runs of your roofline.
- The metal shows significant rust, corrosion, or pinholes.
- The gutters are warped, structurally damaged, or pulling away from the fascia in multiple areas.
- You want to eliminate seams entirely by upgrading to a seamless gutter system.
Seamless gutters are fabricated on-site from a single continuous piece of aluminum, meaning they only have joints at the corners and downspouts. Upgrading to seamless gutters virtually eliminates the risk of future seam leaks. If you are experiencing constant leaks and want a permanent solution, you can schedule a professional gutter inspection with our team to explore your options.
How to Prevent Future Gutter Joint Leaks
The best way to handle a leaking gutter seam is to prevent it from happening in the first place. A simple maintenance routine will extend the life of your gutter system and its sealant.
Regular Cleaning and Debris Removal
Clean your gutters at least twice a year, ideally in the spring and late fall. Removing leaves, twigs, and sediment prevents standing water and reduces the physical weight pressing down on your seams. If your home is surrounded by mature trees, cleaning them more frequently is highly recommended.
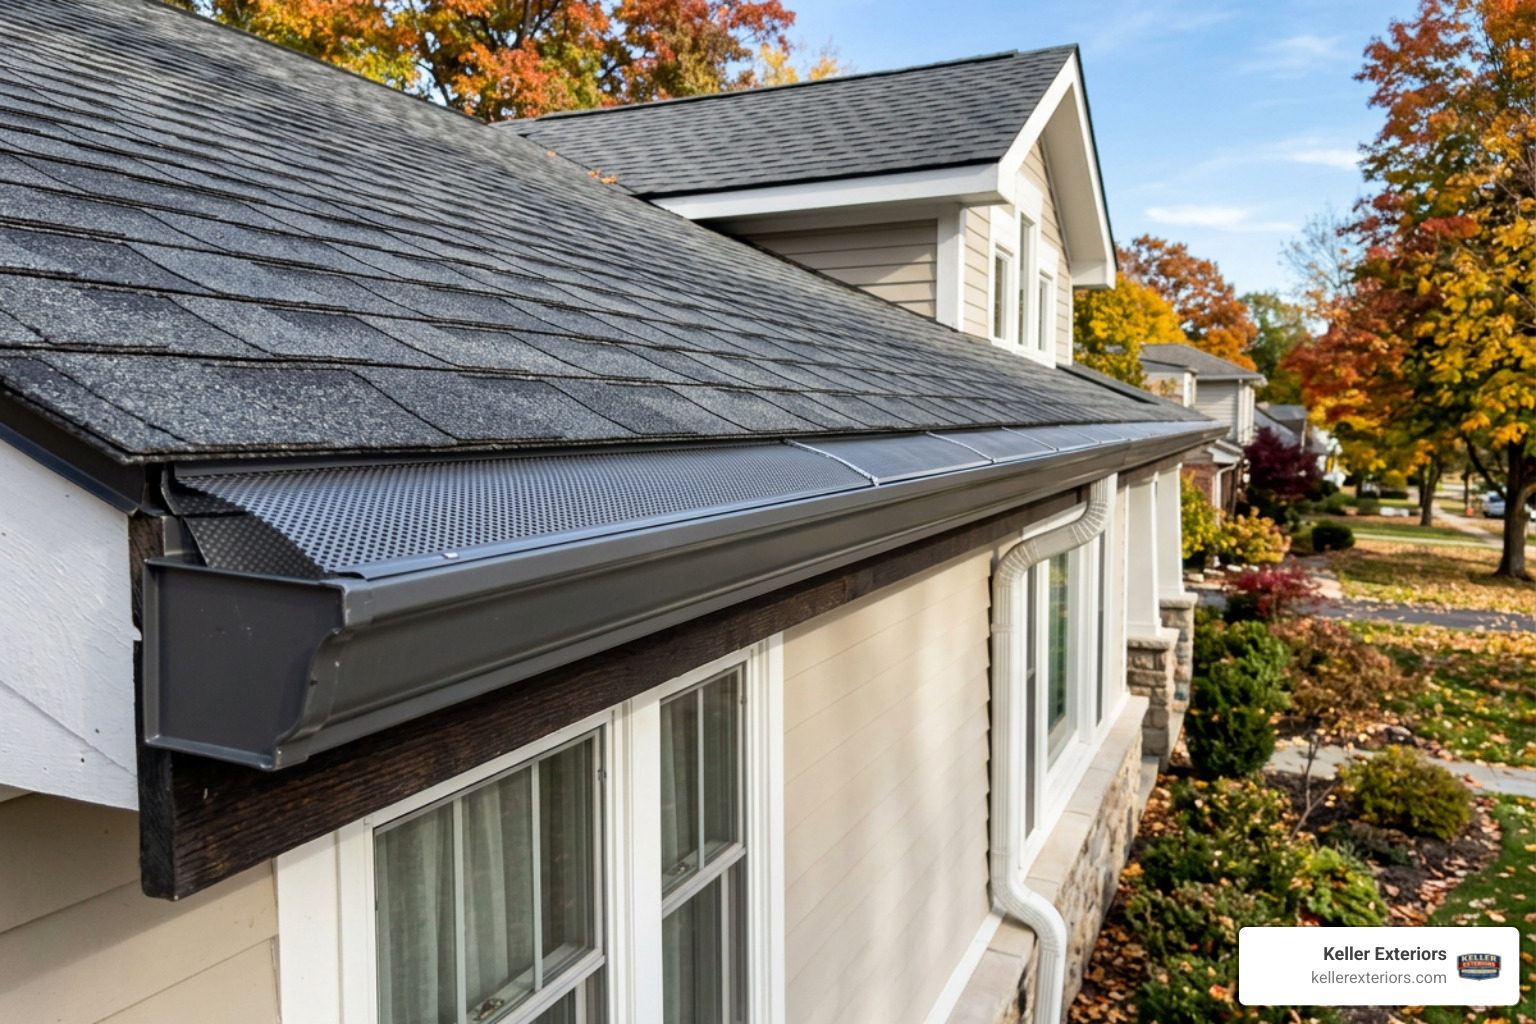
Install High-Quality Gutter Guards
Gutter guards act as a protective barrier, letting water in while keeping leaves and large debris out. By preventing clogs, gutter guards eliminate standing water and protect your seams from structural strain.
Annual Slope and Support Checks
Once a year, inspect your gutter hangers. Tighten any loose screws and replace damaged hangers. Ensure your gutters maintain their proper pitch toward the downspouts so water drains quickly.
Proactive Seam Inspections
Do not wait for a leak to show up on your siding. Every spring, take a walk around your home during a rainstorm to check your joints. Catching a weak seal early allows you to apply a quick touch-up before it turns into a major headache.
Frequently Asked Questions About Gutter Seams Leaking
1. Why is my gutter leaking at the seam?
Gutter seams leak when the waterproof sealant inside the joint degrades due to age, UV exposure, and thermal expansion. Debris clogs that hold standing water over the joints and structural sagging also accelerate sealant failure.
2. What is the best sealant for leaking gutter joints?
Butyl rubber and polyurethane sealants are the best choices for metal gutters. They offer superior adhesion, remain highly flexible during extreme temperature swings, and handle constant moisture exposure without breaking down.
3. Can I seal gutter joints from the outside?
No, you should always seal gutter joints from the inside. Applying sealant to the outside is ineffective because water still enters the joint, traps moisture, and eventually forces the exterior sealant to peel away.
4. How long does gutter joint sealant last?
Under normal weather conditions, a high-quality, professionally applied gutter sealant lasts between 5 and 10 years. Extreme temperature fluctuations and regular debris clogs can shorten this lifespan to 3 to 7 years.
5. Do I need to remove old sealant before resealing?
Yes, you must completely remove all old sealant before applying a new layer. New sealant will not adhere properly to old, weathered material, leading to a quick failure of your new repair.
6. Can clogged gutters cause seam leaks?
Yes, clogged gutters are a leading cause of seam leaks. Clogs trap standing water directly over the joints, putting constant hydraulic pressure on the sealant and adding heavy weight that pulls the seams apart.
7. How often should I inspect my gutters for leaks?
You should inspect your gutters at least twice a year, preferably in the spring and fall. It is also wise to perform a quick ground-level check after severe wind or ice storms.
8. Why do gutter corners leak more often than straight seams?
Corner joints, or miters, handle concentrated water runoff from intersecting roof valleys. This high volume and velocity of water create turbulence that wears down sealant much faster than straight gutter runs.
9. When should I replace my gutters instead of repairing them?
You should replace your gutters if they are over 20 years old, show extensive rust or corrosion, have multiple failing joints, or are structurally sagging and pulling away from your home.
10. Can a leaking gutter seam cause foundation damage?
Yes, water dripping constantly from a leaking seam pools next to your home’s foundation. Over time, this water can erode the surrounding soil, seep into your basement, and cause serious foundation cracks.
Protect Your Home From Water Damage
Dealing with gutter leaks can be frustrating, especially when you are balancing on a ladder trying to scrape away old, stubborn sealant. If your gutters are showing their age, sagging, or leaking at multiple seams, let a professional team handle the work safely and efficiently.
With over 20 years of experience, our team at Keller Exteriors provides trusted exterior solutions for homeowners across Oklahoma. We serve communities throughout the region, including Tulsa, OK, Broken Arrow, OK, Owasso, OK, Jenks, OK, Bixby, OK, Sand Springs, OK, Claremore, OK, and Bartlesville, OK.
Whether you need a quick repair, a complete gutter replacement, or new energy-efficient replacement windows to protect your home’s envelope, we are here to help. Schedule your professional gutter service today and keep your home safe from water damage.