What to Do Right Now If Your Roof Is Leaking
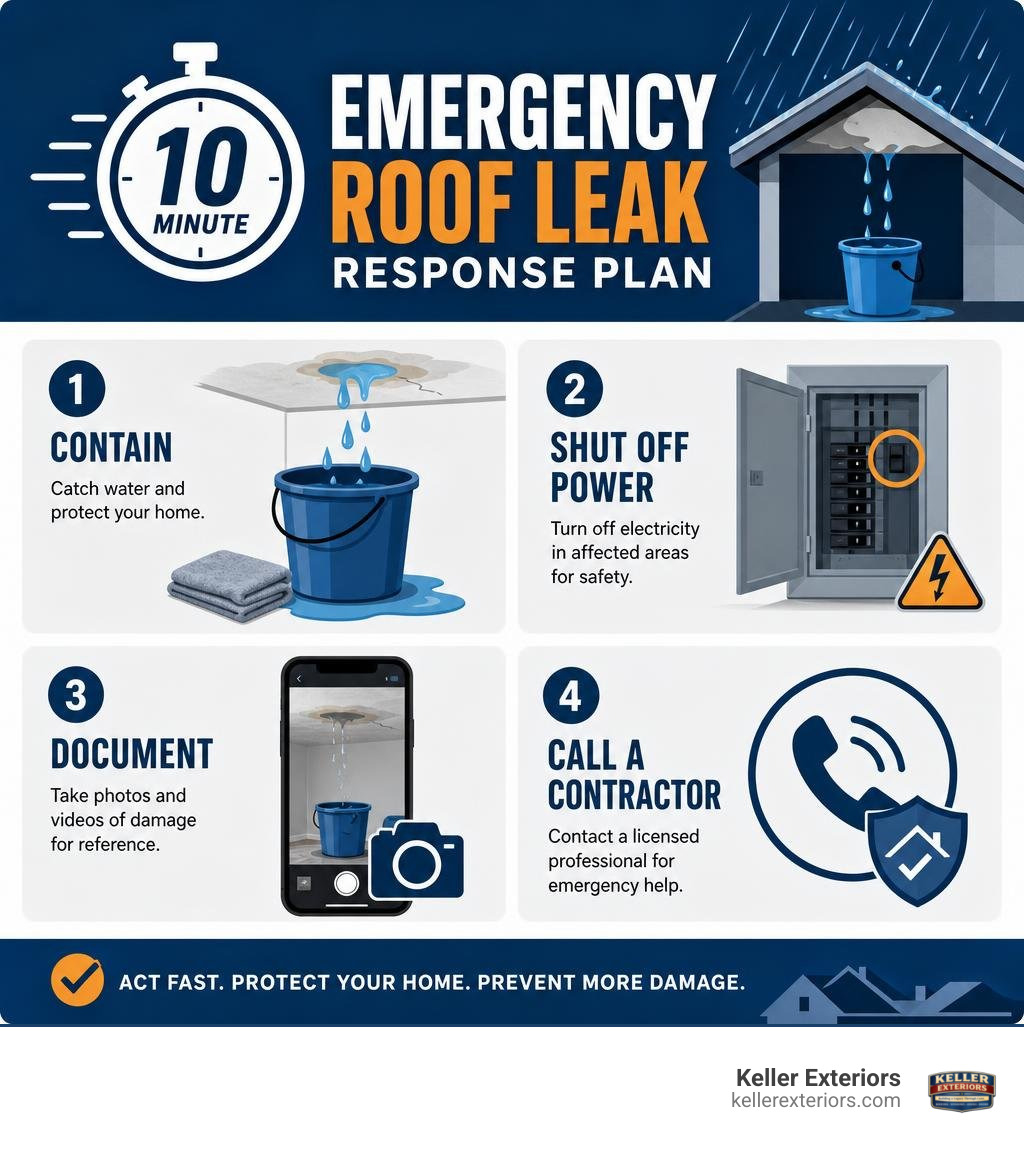
If you are dealing with emergency roof leak repair right now, here is what to do in the next 10 minutes:
- Move people, pets, and valuables away from the affected area.
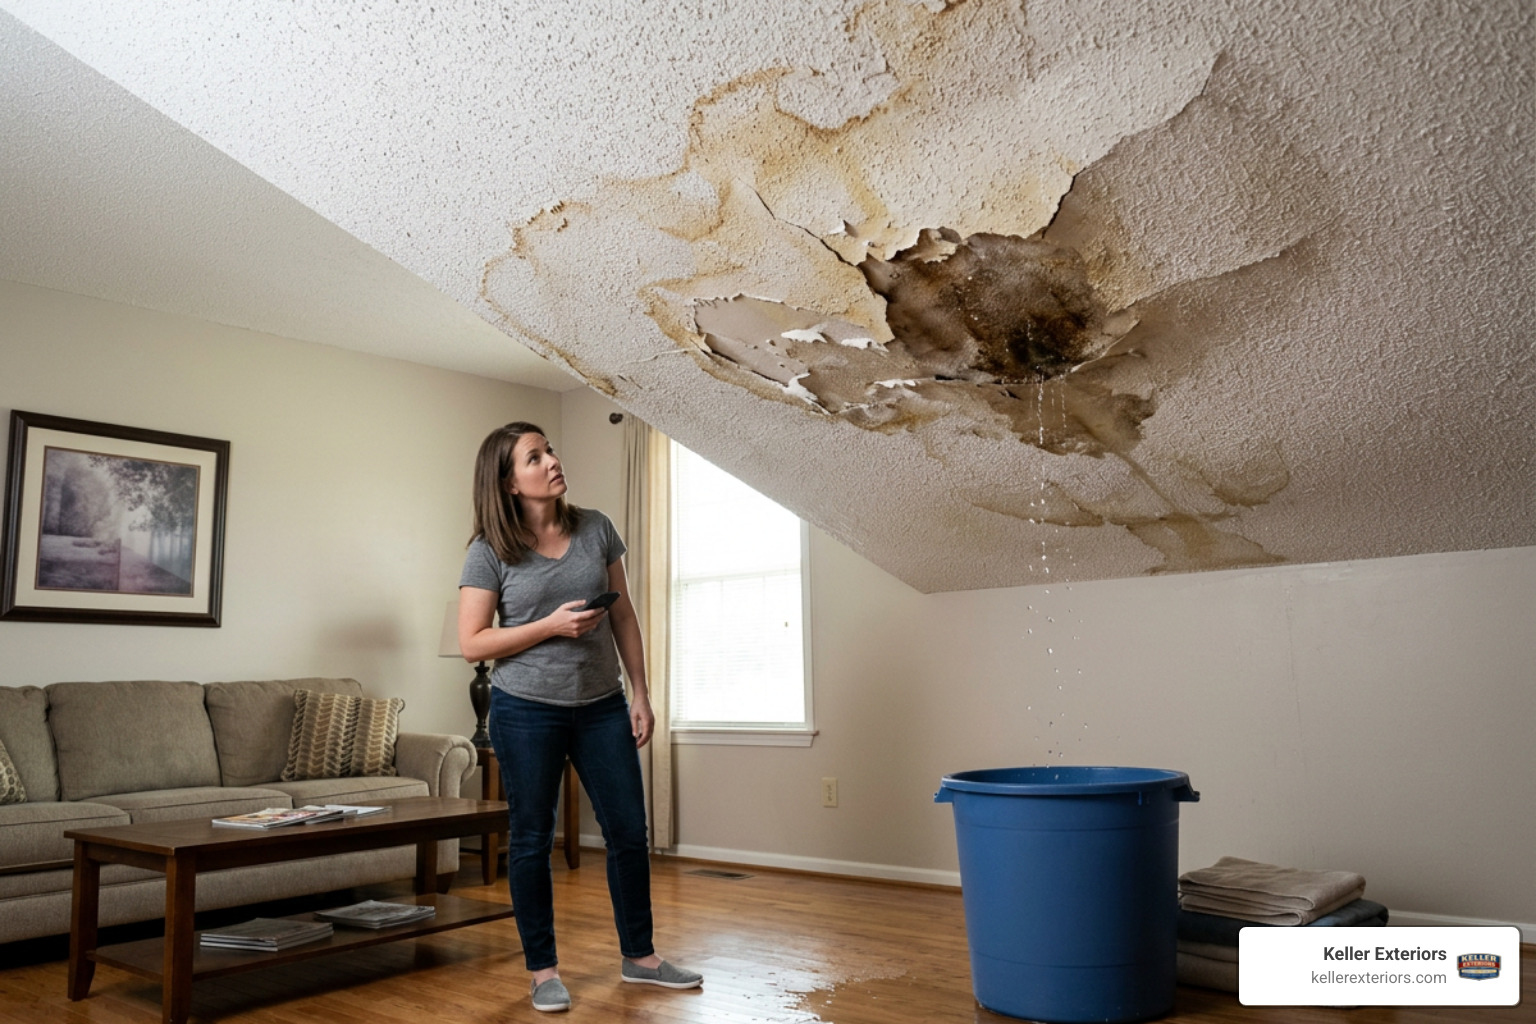
- Place buckets or bins under active drips to catch water.
- Shut off power to any rooms where water is near light fixtures or outlets.
- Poke a small hole in a sagging ceiling to let pooled water drain in a controlled spot before it collapses.
- Document everything with photos and video before you touch anything else.
- Call a licensed roofing contractor for emergency service.
A sudden roof leak does not just bring water into your home. It brings the risk of mold, structural damage, and a wave of decisions that need to happen fast. Even a small leak can become a serious problem within 24 to 48 hours, especially in humid conditions where mold can begin to grow almost immediately. Left unaddressed, water travels silently into wall cavities, electrical systems, and insulation long before you see visible damage on the ceiling.
Whether a storm tore off shingles, a tree limb punctured your roof, or a slow drip suddenly turned into a stream, the first hours matter most. Knowing what to do before a professional arrives can be the difference between a manageable repair and a costly restoration project.
At Keller Exteriors, our team brings more than 20 years of exterior-project experience to urgent roof leaks. We help homeowners make safe, informed decisions, protect the property from additional damage, and plan the right next step with confidence.
When to Call for Emergency Roof Leak Repair
Not every leak requires an immediate, middle of the night phone call, but some situations absolutely do. Knowing the difference between a minor issue you can address during normal business hours and a true emergency keeps your family safe and prevents catastrophic property damage.
Severe storms in northeastern Oklahoma can strike without warning, leaving homeowners in places like Tulsa, OK, and Broken Arrow, OK, dealing with sudden roof destruction. When wind, hail, or falling debris punctures your home, you must act quickly to stabilize the structure.
Active Water Intrusion vs. Slow Drips
An active leak means water is steadily pouring, streaming, or dripping into your living space. If you have to empty a bucket every few hours, you are dealing with active water intrusion. This scenario is a clear emergency because water is actively destroying your drywall, ceiling joists, and flooring.
Active leaks also present major electrical hazards. If water travels down a wall cavity or through a ceiling light fixture, it can short out your wiring or cause an electrical fire. If you see water dripping from an outlet or light fixture, shut off the power at your breaker box immediately. Do not touch the wet switches or fixtures yourself.
A slow drip or a damp spot on the ceiling is still a concern, but it may not require after hours dispatch fees. If the weather is dry and the dripping has stopped, you can typically wait to schedule a standard inspection during normal business hours. However, if more rain is in the forecast, even a slow drip can quickly accelerate into a major flood.
Structural Hazards and Storm Damage
Heavy winds and fallen tree limbs can cause immediate structural risks. If a tree branch punctures your roof decking, the structural integrity of your home is compromised. This is a severe emergency. A sagging ceiling is another major warning sign. When water pools on top of drywall, the weight can cause a sudden, dangerous ceiling collapse.
Storms in Owasso, OK, and Jenks, OK, often bring high winds that strip away entire sections of shingles. When the protective outer layer of your roof is missing, your underlayment is directly exposed to the elements. This exposure leads to rapid water penetration. If you spot structural sagging, large areas of missing shingles, or physical punctures from debris, you need to call for emergency assistance right away.
The 72-Hour Emergency Playbook: Step-by-Step Action Plan
When a crisis hits, having a clear timeline keeps you focused and prevents costly mistakes. The first 72 hours after discovering a leak are critical for both physical safety and insurance recovery.
| Phase | Core Objective | Key Actions |
|---|---|---|
| Hour 0 to 1 | Immediate Containment | Catch dripping water, protect furniture, relieve ceiling pressure, shut off electricity if needed. |
| Hour 1 to 4 | Documentation & Temporary Shielding | Take detailed photos and videos, apply temporary tarping or patch seals if safe. |
| Hour 4 to 24 | Insurance & Professional Dispatch | File a claim, contact a trusted local roofer, schedule an emergency inspection. |
| Hour 24 to 48 | Professional Assessment | Contractor evaluates the roof, provides a written estimate, and stabilizes the leak. |
| Hour 48 to 72 | Permanent Restoration Plan | Finalize the insurance claim details and schedule permanent roof repairs. |
Hour 0 to 1: Contain the Water and Protect Belongings
Your first hour is all about damage control. Grab plastic buckets, trash cans, or storage bins to catch the water. If the water is splashing out of the bucket and onto your floors, place an old towel or a sponge at the bottom of the container to silence the drips and absorb the splash.
Move all furniture, electronics, clothing, and family heirlooms out of the room. If you cannot move heavy furniture, cover it completely with thick plastic sheeting or heavy-duty trash bags.
If you notice your drywall ceiling bulging or sagging, it is holding a dangerous amount of water. Take a screwdriver, a nail, or a small drill bit, stand to the side, and poke a small hole directly in the center of the sag. This relieves the immense physical pressure on the drywall, allowing the water to drain into your bucket in a controlled stream rather than causing the entire ceiling to cave in.
Hour 1 to 4: Document the Damage and Apply Temporary Protection
Once the water is contained inside, you must document the scene. Take clear, well-lit photos and videos of the active leak, the damaged ceiling, wet carpet, ruined furniture, and any visible roof damage from the safety of the ground. Do not clean up the mess or throw away damaged items before taking photos, as your insurance adjuster will need this physical proof.
If the storm has passed and it is completely safe to do so, temporary protection can help limit additional water entry. Our roofing services include professional emergency stabilization and repair planning for damage that is unsafe to address yourself.
Hour 4 to 24: Contact Insurance and Schedule an Inspection
Most homeowners insurance policies contain a loss-prevention clause. This clause legally requires you to take immediate action to mitigate further damage to your home. If you allow water to pour into your house for days without attempting to cover the roof or call a contractor, your insurance carrier may deny your claim.
Contact your insurance company to report the damage and start your claim. Let them know you have taken steps to contain the water and are bringing in a professional to inspect the roof.
Next, schedule an on-site evaluation with a local contractor. A local expert can provide a detailed, line-item estimate that you can hand directly to your insurance adjuster.
Safe and Effective Temporary Fixes for Homeowners

While you wait for a professional roofing crew to arrive at your home, you might need to apply temporary fixes to protect your interior. However, safety must always remain your absolute highest priority.
How to Tarp a Roof Safely
A properly installed tarp is the most reliable temporary shield against incoming rain. It can protect your home for several weeks while you arrange permanent repairs. To tarp a roof correctly, you need a heavy-duty, woven plastic tarp that is large enough to cover the damaged area and extend over the peak of the roof. Extending the tarp over the ridge prevents water from running underneath the top edge of the plastic.
Secure the tarp using thin wooden boards, often called cap shingles or furring strips. Lay the wood strips along the edges of the tarp and screw them directly into the roof deck using exterior-grade screws. Avoid using staples or nails alone, as strong winds can easily rip the tarp right off the fasteners. Never screw boards directly into valleys or flashing, as this will create new, permanent leak paths.
Using Sealants for Minor Emergency Roof Leak Repair
For small, localized punctures or cracked flashing, a rubberized wet patch sealant can provide an instant temporary seal. Products designed with high wet-surface adhesion can be applied directly to wet shingles, standing water, or metal flashing during an active rainstorm.
If you are deciding whether a temporary patch is appropriate, our guide to roof patch and sealant options explains where these products can help and where professional repair is the safer choice.
Use a trowel or a putty knife to spread the thick sealant over the damaged seam or crack. For a stronger, more durable patch, apply a layer of sealant, press a piece of reinforcing fabric or mesh into the wet patch, and then apply a second layer of sealant over the top. This creates a tough, flexible barrier that can withstand extreme weather until a permanent repair is scheduled.
What to Avoid While Waiting for a Professional
Never climb onto a wet, icy, or wind-swept roof. Falls are a leading cause of serious construction injuries, and a wet roof is incredibly slick. If the wind is still blowing or rain is falling heavily, stay on the ground. No amount of property damage is worth risking your physical safety.
Avoid attempting complex structural repairs on your own. Do not try to replace plywood decking or rebuild rafters without professional training and proper tools. Improperly executed DIY work can weaken your roof structure, void your shingle warranties, and lead to insurance claim denials. Keep your focus on simple containment and temporary shielding.
Navigating Insurance Claims and Repair Costs
Dealing with insurance companies can feel overwhelming, especially when you are stressed about a leaking ceiling. Understanding how the claims process works helps you secure the coverage you deserve.
Understanding What Insurance Covers
Standard homeowners insurance policies typically cover sudden, accidental damage caused by storm events, such as high winds, hail, falling trees, or lightning. If a severe storm rips shingles off your roof in Bixby, OK, or Sand Springs, OK, your policy will likely cover the cost of emergency tarping, temporary stabilization, and permanent repairs.
However, insurance policies generally do not cover leaks caused by wear and tear, lack of maintenance, or old age. If your roof is past its expected lifespan and has slowly deteriorated over twenty years, the insurance company will likely deny the claim, viewing the leak as a maintenance issue rather than an accident.
Estimating Emergency Roof Leak Repair Costs
The cost of resolving an emergency leak is split into two categories: immediate stabilization and permanent repair. Immediate stabilization includes emergency dispatch fees, professional tarping, and temporary sealing. These costs vary based on the size of your roof, the pitch of the slope, and how difficult it is for the crew to safely access the damaged area.
If water has soaked your ceilings, walls, or floors, you may also face water damage restoration and mold remediation costs. Because mold can grow in as little as 24 to 48 hours, drying out your home with professional dehumidifiers and air movers is a crucial step. Fortunately, if the initial roof damage is covered by your insurance policy, the resulting interior water damage restoration is usually covered as well.
Repair vs. Replace: Making the Right Call After a Leak
Once your home is stable and dry, you must decide whether to repair the damaged section or invest in a full roof replacement.
Signs You Only Need a Targeted Repair
If your roof is relatively new and the damage is confined to one specific area, a targeted repair is usually the most practical choice. Common issues that only require localized repairs include:
- Failed pipe boot flashing or rusted chimney flashing.
- A small group of wind-blown shingles.
- A minor puncture from a small fallen branch.
- A single leaking skylight.
A professional inspection can confirm whether the rest of the roof remains sound and whether a focused repair will restore reliable protection.
Signs It Is Time for a Full Roof Replacement
If your roof is approaching the end of its useful lifespan, a single emergency leak is often a warning sign of widespread system failure. You should consider a full replacement if you notice:
- Water leaking in multiple, unrelated areas of your home.
- Widespread hail bruising or wind damage across multiple roof slopes.
- Rotting plywood decking beneath the shingles.
- Shingles that are curling, cracking, or losing their protective granules.
For a closer look at replacement decisions, our article on roof replacement options can help you compare the condition of your roof with the work a lasting solution may require.
When damage affects a large portion of the roof, or repeated repairs no longer make sense, a complete replacement can be the more dependable long-term solution. A qualified contractor can assess the entire roofing system and recommend the right scope of work.
How to Prevent Future Roof Leak Emergencies
The best way to handle a roofing emergency is to prevent it from happening in the first place. A proactive approach to home maintenance saves you money, protects your interior, and extends the lifespan of your roof.
Annual Professional Inspections
Schedule a professional roof inspection at least once a year, preferably in the spring before the severe storm season begins. Regular inspections help identify potential problems before they cause major water damage. A trained inspector can spot minor issues before they turn into major water leaks.
During an inspection, a professional will check the integrity of your shingles, look for cracked or rusting flashing, inspect the sealants around your skylights and chimneys, and evaluate your attic for signs of hidden moisture or poor ventilation. Catching a cracked pipe boot in Claremore, OK, or Bartlesville, OK, during a routine check can save you from a major ceiling leak later in the year.
Simple Homeowner Maintenance Tasks
You do not have to climb onto your roof to keep it in good shape. There are several simple maintenance tasks you can handle from the ground or with a ladder:
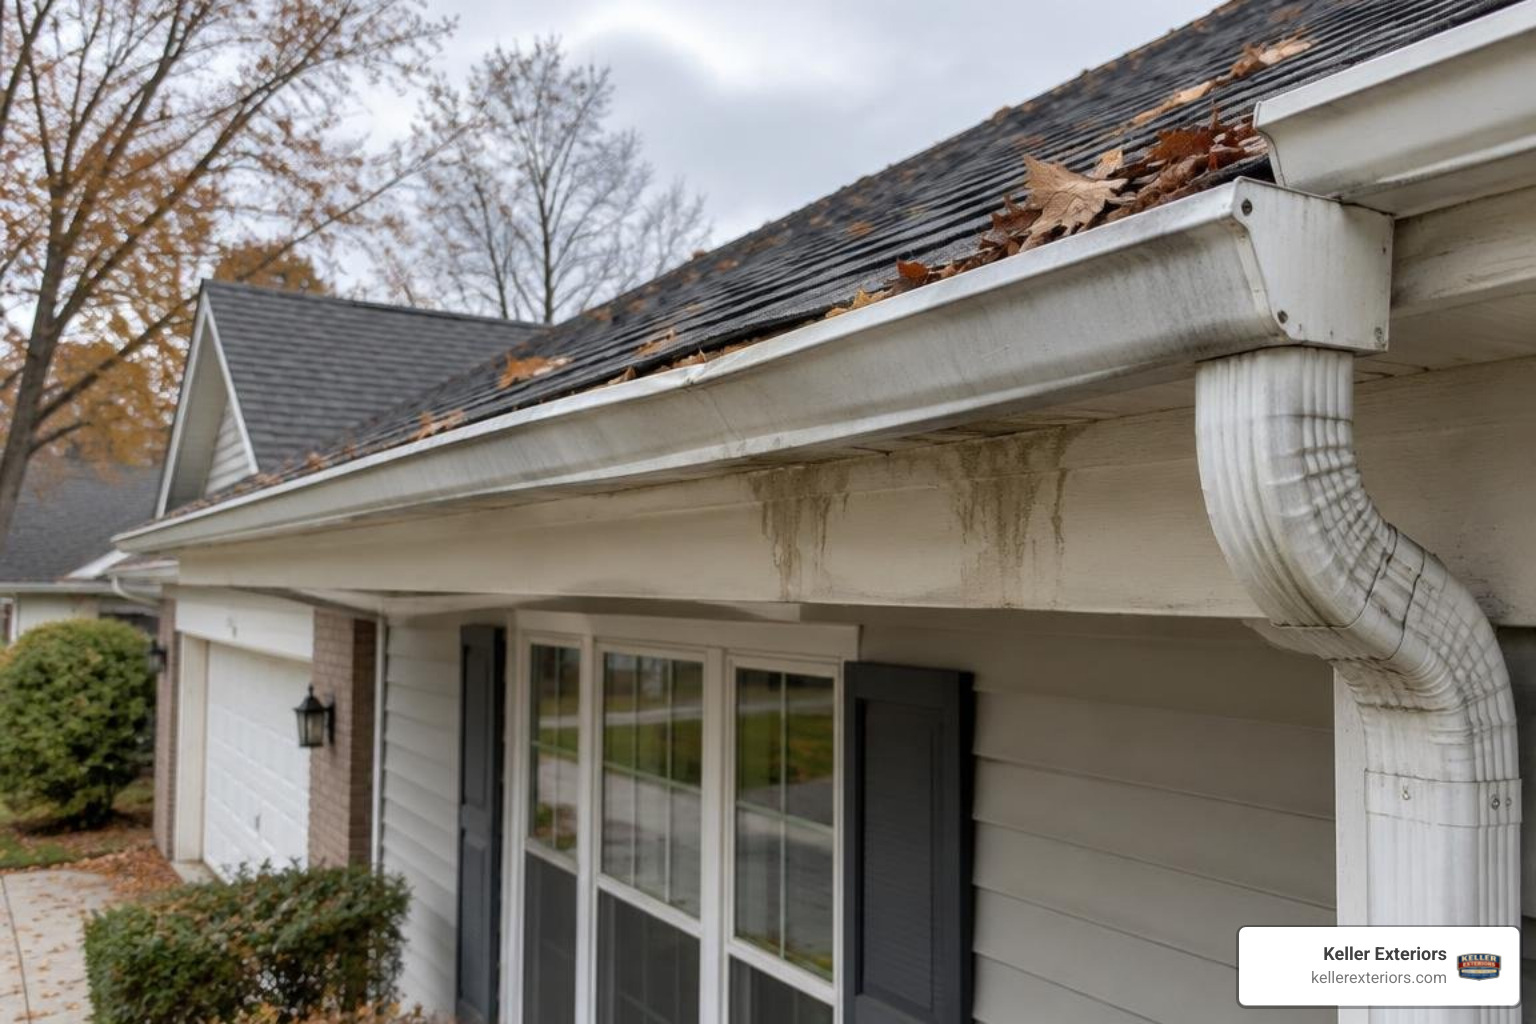
- Clean your gutters: Clean your gutters at least twice a year. Clogged gutters cause rainwater to back up under your shingles, leading to rotted roof decking and interior leaks.
- Trim overhanging branches: Keep tree limbs trimmed back at least six feet from your roofline. This prevents branches from rubbing against your shingles or snapping during high winds.
- Inspect your attic: Periodically check your attic after a heavy rainstorm. Look for damp insulation, water stains on the rafters, or musty odors that indicate a slow, hidden leak.
If gutter damage or persistent overflow is directing water toward your roofline, our gutter services can help restore proper drainage before it contributes to another leak.
Frequently Asked Questions About Emergency Roof Leak Repair
1. What is considered a roofing emergency?
A roofing emergency is any situation where water is actively entering your home, threatening your safety, or compromising the structural integrity of your property. Examples include large holes from fallen tree limbs, major sections of missing shingles after high winds, sagging ceilings, and water leaking near electrical systems.
2. Will homeowners insurance cover emergency roof tarping?
Yes, most homeowners insurance policies cover emergency tarping under the loss-prevention or mitigation clause. Insurance companies require you to take immediate action to protect your home from further water damage, and they will typically reimburse you for the cost of professional tarping services.
3. How long can a temporary tarp stay on a roof?
A high-quality, professionally installed tarp can safely protect your roof for 60 to 90 days. However, tarps are only temporary solutions. They will degrade over time when exposed to heavy wind, rain, and intense sunlight, so you should schedule permanent repairs as quickly as possible.
4. Can I repair a roof leak while it is still raining?
Applying permanent repairs during a rainstorm is incredibly difficult and dangerous. However, temporary stabilization, such as installing a tarp or applying specialized wet-surface sealants, can be done during light rain if conditions are safe. If high winds or lightning are present, all outdoor work must wait until the storm passes.
5. How much does professional emergency roof tarping cost?
The cost of professional tarping varies depending on the size of the damaged area, the slope of your roof, and how difficult it is to access. Because emergency tarping prevents thousands of dollars in interior water damage, it is a highly cost-effective step that is usually covered by your insurance policy.
6. How quickly does mold grow after a roof leak?
Mold can begin to grow in as little as 24 to 48 hours in damp, humid environments. To prevent mold growth after a roof leak, you must stop the water intrusion immediately and use professional drying equipment to remove moisture from your drywall, insulation, and carpets.
7. Should I poke a hole in my ceiling if it is sagging from water?
Yes. Poking a small hole in the center of a sagging ceiling allows the trapped water to drain into a bucket in a controlled manner. This relieves the immense weight on the drywall, preventing a sudden, dangerous ceiling collapse that would cause far more damage to your room.
8. Does insurance cover roof leaks caused by old age?
No, standard homeowners insurance policies do not cover leaks caused by normal wear and tear, lack of maintenance, or old age. Insurance is designed to cover sudden, accidental storm damage. If your roof leaks simply because it is old, you will be responsible for the repair or replacement costs.
9. What temporary sealant works best on a wet roof?
A rubberized wet patch roof sealant is the best option for wet roofs. These specialized formulas are designed to adhere to wet surfaces and can even be applied underwater, making them perfect for sealing small leaks, cracks, and flashing seams during active rain.
10. How do I choose a reliable emergency roofing contractor?
Look for a local contractor with proper licensing, comprehensive general liability insurance, and a strong reputation in your community. Avoid out-of-state storm chasers who knock on doors after a severe weather event, as they often lack local credentials and may not be around to honor their warranties.
Secure Your Home with Trusted Local Roofing Experts
When water is dripping into your home, you do not have time to wait. You need a fast, reliable team that understands the unique weather challenges of northeastern Oklahoma. At Keller Exteriors, we bring more than 20 years of local experience to every project, offering one trusted team for all of your roofing, siding, and exterior needs. We serve homeowners across the entire region, including Tulsa, OK, Broken Arrow, OK, Owasso, OK, Jenks, OK, Bixby, OK, and Sand Springs, OK.
Whether you need immediate storm damage mitigation, a targeted leak repair, or a complete system replacement, our skilled crew is ready to protect your home. We use premium materials, provide clear communication, and assist you through the insurance claims process to make your restoration project as smooth as possible.
Do not let a minor leak turn into a costly structural headache. If you are dealing with storm damage or active water intrusion, contact our professional emergency roof leak repair technicians at Keller Exteriors today.